Pot Painting with POP

Greeting to all my buddies.. Hope days are going great with fun, love and enjoyment. Here's another one to share with you all. I tried out this Pot painting with POP (Plaster of Paris), m-seal and acrylic colors.


Try out this attractive, yet cost effective pot painting and garnish your living room. The following steps would help you out,
1. Buy a plain terracotta pot with a desirable size. Mix POP, fevicol and water to get a paste like consistency.
2. Initially apply the POP paste evenly throughout the pot. Once its dried, draw your design over the pot with pencil.
3. Mix the three ingredients into thick paste and apply the paste over the design, allow it to dry completely.
4. In order to get the exact shape of your design, use m-seal at the borders.
5. Use metallic colors to add richness to your design.

Hope you all like it. Kindly share your valuable comments, which would help me to enhance my work.
Enjoy your work!! Have a great day!!

My Glass Painting


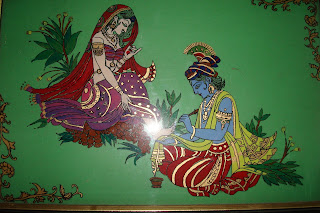
Hi all, feel great to present my glass work in our blog, hope you all like it. Glass paintings with normal slovent based glass colors would be a common one. For a change i have tried it out completely with acrylic colors.


Hope you all like it. Kindly give your valuable comments, so that it helps me to improve my work.
Have a great day!!!!
Enjoy your work!!


My Pencil Art

Hi all, its a pleasure for me to share my pencil work with you all. This is one of my pencil work, hope lord jesus have come out well. If there are any inaccuracies or if need on some improvements, kindly share on your valuable comments.

Hope you all liked it..
Have a wonderfull day!!!

Wedding Aarathi Plates

Weddings are decided in heaven!! But you can decide how your wedding should be!! Yes every single moment in your marriage is very auspicious. To add more color and happiness, we make aarathi plates for your wedding. Have look at some of the plates below and imagine how it would be, if these plates are dazzling in your marriage hall.


These are some of the sample plates that i have done in one of my friend marriage. We assure you that we provide you quality plates at an affordable rates. We also do plates for several other occasions like engagement and birthday. Let the lighted candles in the plates gives you added glow and brightness in your face and heart.

For more details or orders you can write me to,


Its your wedding, make it colorful, special and unique!!!!!
Have a great day!!

Oil Painting


Hi all, its been a long time i ve posted my paintings due to some reasons..

Here's a painting, that we would have all heard off, its 'Oil Painting'. It might seem to be very difficult, but actually its not. Once the painting is completed, the look of an Oil Painting is peculiar from all the other paintings. This is one of my work and let me share with you how i had started with.

Things Required:
1.Canvas Board
2.Oil colors
3.Brushes of different sizes
4.Linseed Oil (medium)
5.Palette

Procedure:
1.For oil paintings we use Canvas board as a base. Here i have chosen a flower vase design.
2.The oil colors have to be mixed with a medium. Here i have used Linseed oil as a medium. There are many other mediums available in the market, you can use any of them.
3.If you like to give any background color, apply the color on the base with several shades according to your creativity.
4.Oil colors takes a long time to dry. So once you apply background color, dont wait to dry completely. After painting just leave it for 15 minutes and start drawing the design on the base with a sharp edge (pencil or ball point pen).
5.Once the design is drawn over the board, its ready to paint.
6.Here comes your creativity, its same as the normal painting. The strokes adds life to your paintings. Use different colors for flowers. Mix the colors for better effect.
7.Oil paintings takes long time to dry completely. Once the painting is done dry it in a dust free area. It might take nearly one week or ten days to dry off completely.
8.Once its dried, now your painting is ready to frame up..... :-)

Hope this post would have helped you in some way or the other. Njoy your work... :-)

Reverse Cardboard Art


Hi people, am quite happy to post this particular Reverse Cardboard Art. Coz this is something special for me, since i gifted this painting to one of my buddy. I got this image fortunately from google while searching for a different purpose. It was really very catchy and i was impressed. Then thought off  'why cant we try this out!!Being simple and elegant to look!!'..... And this how i did it....:-)

Materials Required:
1.Wooden Plywood (Base)
2.Fabric Paints
3.Metallic Color (Gold or Copper)
4.Small Golden or Copper color beads
5.Fevicol

Description:

1.In general we use the flat surface of the wooden board for painting. Now here i have used the harder surface of the wooden board. Draw the image over the base with the help of chalk.
2.Use fabric colors to paint the image. Paint the image completely, except the portion were metallic colors need to be used.
3.Now gold metallic colors can be used to paint the remaining part of the image. Give an even coat of colors to the entire image in order to have an elegant look.
4.Now moving on to the border part of image. First paint the borders using metallic colors. Use copper metallic color if you have decided to use copper beads. Else gold metallic for gold beads.
5.Once the painting part is done, allow the image to dry completely.
6.If its completely dried, apply a thin fevicol layer to the borders were we have applied metallic colors. Now sprinkle the beads over the fevicol and wait for 5 minutes.
7.Once its done tap the board towards the floor, so that the extra beads withers. Allow the painting to dry completely.
8.Process ends up here. Dazzling Reverse Cardboard Painting is done!!

While gifting this painting, the happiness that blossomed in her face was priceless... Here comes the self satisfaction... :-) :-)

Enjoy your work!!!!!!!!!!:-)

Kundhan Art


Ganesha Painting done with Kundhan Stones


Hi all, this is one of my painting that i tried out with kundhan work, velvet paper and torn out clothes. Yes!!!! that was my mom's old torned out saree.. :-) I 'd like to share you all how i started with this.

Materials Required:
1. Cardboard (Base)
2. Velvet cloth (black)
3. Velvet paper (red & green)
4. Any old silky clothes
5. Kundhan Stones
6. Acrylic Glitters
7. Fabric paints
8. Fevicol

Description:

1. Take a cardboard of required size and wrap it up with black velvet paper
2. Take a carbon copy of the image on the base, that you wish to paint.
3. The skin portion of ganesha is cutted out from a skin color painted chart paper. Get the image of ganesha's  organs separately (with the help of white carbon paper) and stick it over the black base.
4. Now get the image of ganesha's outfit on red and green velvet paper. Cut the image and stick on to the base
5. The screen's can be getit done with the help of old clothes. Cut the clothes into required shapes and stick over the base. (Hint: you can also use torned out clothes for ganesha's outfit instead of velvet papers)
6. Since the parts of ganesh has been stuck part by part, inorder to hide those impressions, you can use glitters for outlining.
7. Here for my pic, i have used colored beads for making garlands. You can get those beads in local stationaries.
8. The ornaments has been drawn with the help of gold acrylic glitters and colored kundhan stones. The impressions and folding over the clothes can also be expressed with the help of glitters.
9. Now your creativity plays the role. You can stick the kundhan stones in your desired places. The eyes and small impessions can be drawn with the help of fabric paints using '000' size brush
10. Hence you'll be able to create a beautifull ganesha painting.

Enjoy your work!!!!!!!!!! :-)